How to change colors
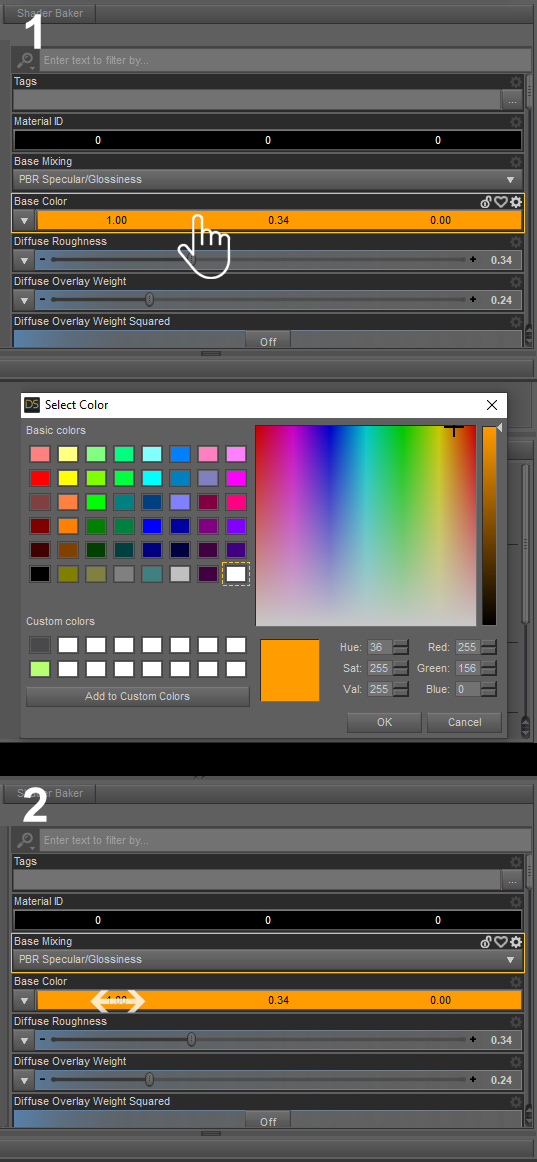
Sometimes you may want to change the color of a 3D garment or create a new color. Compared to other settings this is simple.Select the garment in the "Scene" pane, then switch to the "Surface" pane and make sure, that the garment is selected here as well. When the garment is selected, many parameters are displayed - but normally you only need the "Base Color" parameter.
There are two ways to change the color:
1. Click somewhere between the 3 values. A dialog for color selection will be displayed. Select the desired color and click "OK".
2. Place the cursor on one of the values, hold down the left mouse button and move the mouse to the left or right. This way you can change the color components (red, green and blue) separately. The new color is displayed immediately.
Save the new color
When you save a scene, the new color is also saved. However, if you want to use your color in multiple scenes, you can save it as a "Material Preset".
Click on File ➔ Save as ... ➔ Material(s) Preset ... , select a folder and enter a name for your new color. Click "OK" when you are done.
Multiple Material groups
Often, a 3D garment contains more than one material group. To see the group(s), expand the selected 3D object in the "Surface" pane. An example: The "Basic Wear Shorts" of the GF8 model contains two material groups called "Main Shorts" and "Shorts Elastic".
To give all material groups the same color, select all of them and follow the techniques described above. If you select only one material group, you can change the color of this group separately, giving the 3D garment a multicolored look.
Data protection: this site uses neither cookies nor JavaScript or other functions / methods to analyse the visitor behaviour. No data will be stored. Pushee-Ri
