Drop shapes with different angles
This example shows you how to drop shape objects with different angles. Click on the images to view them in original size in a new TAB.Be sure to follow all the instructions, because the Studio app offers many traps and obstacles that will destroy your previous work.
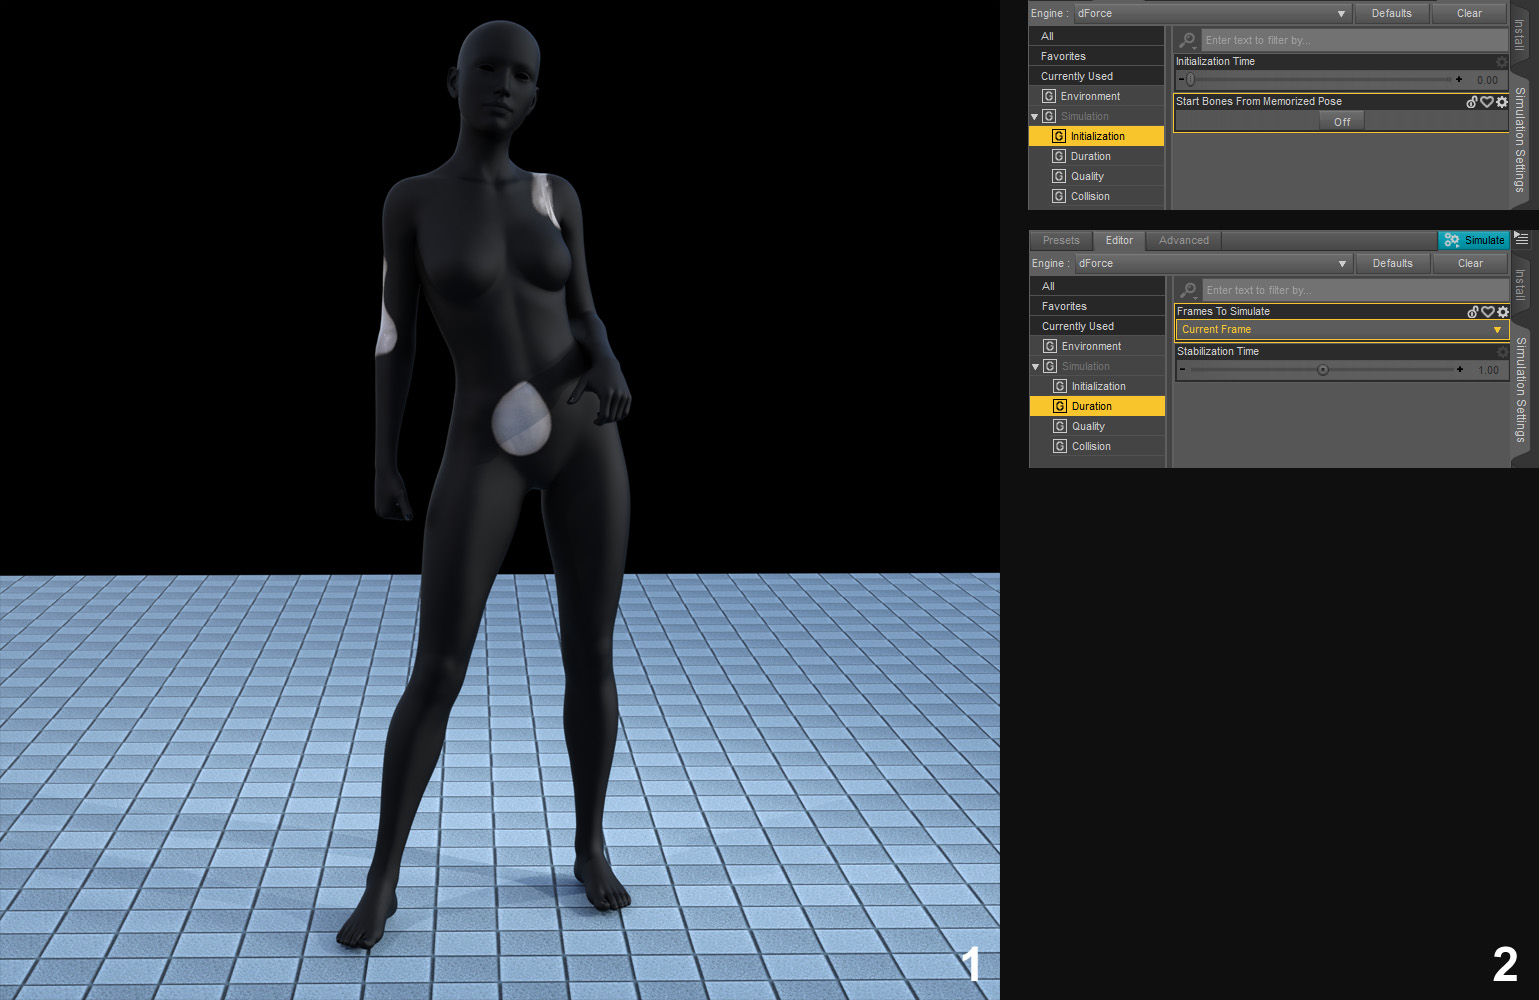
In this example, the shape objects should land on the belly, left shoulder and right arm of the model (image "1" below). This is not very stimulating - but useful to demonstrate dropping objects with different angles.
Very important step! Before you start your simulation, make sure you use the simulation settings as shown in figure "2" below. Switch to the "Simulation Settings" pane and check if Initialization ➔ Start Bones From Memorized Pose is set to "Off" and that Duration ➔ Frames To Simulate is set to "Current Frame". All other settings will destroy your work.
First drop target: the belly
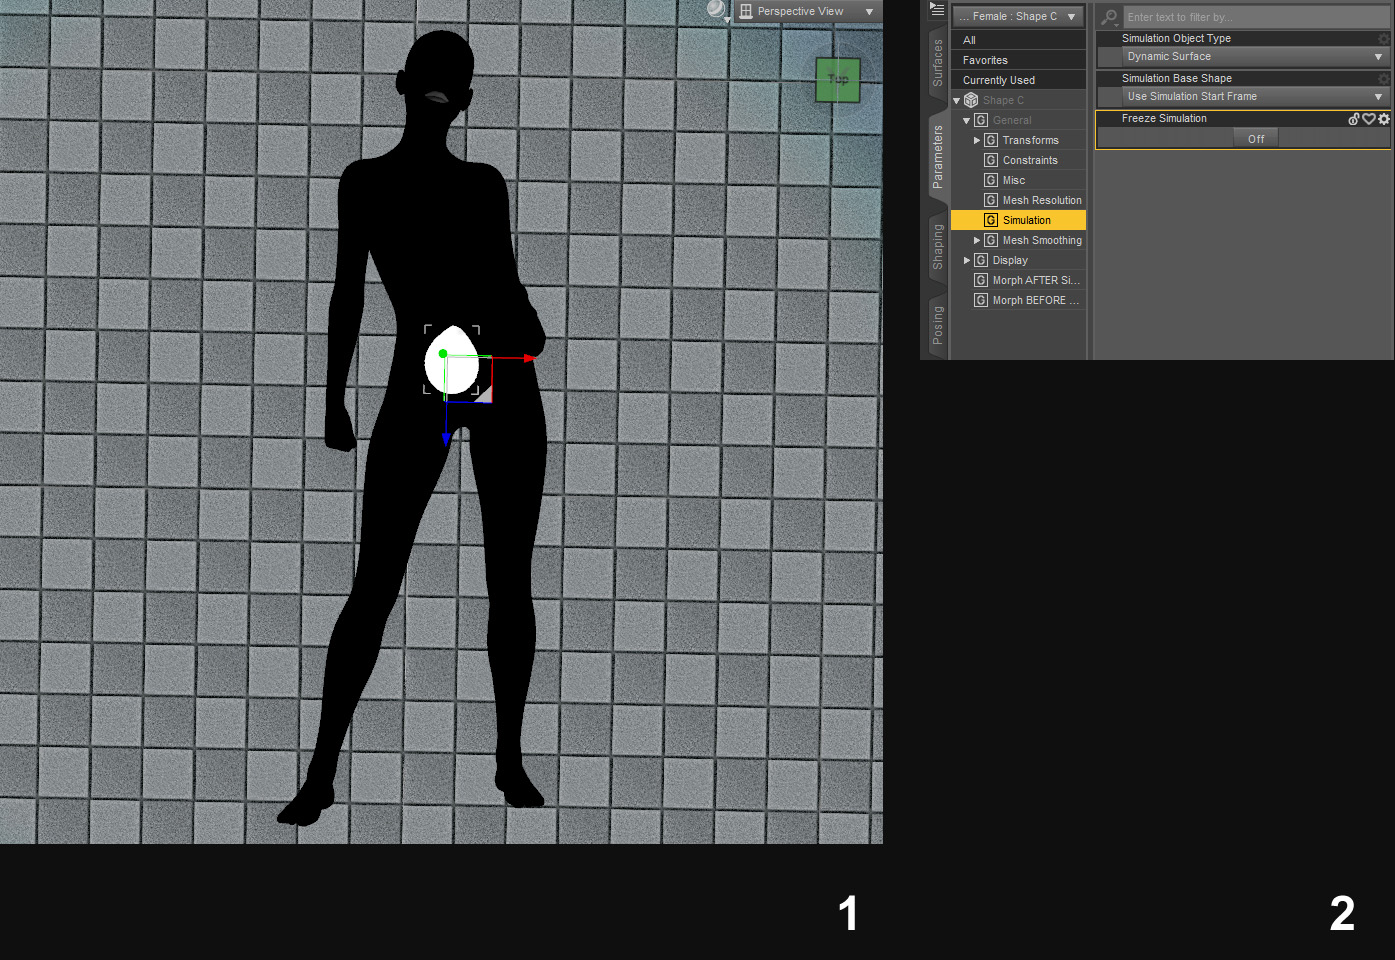
This first step corresponds to the instructions in "Getting Started": rotate the model, load and position a shape object, and start the simulation. After the simulation you have to parent the shape object (also explained in the "Getting Started" section). See picture "1" below. For this first step you can use the normal "Simulate" and "Clear" buttons - but not for the following steps.Very important step! When you are satisfied with the simulation result, you need to "freeze" the simulated shape. Without the "freeze", the following steps will destroy your previous work.
With the shape object selected in the "Scene" pane, switch to the "Parameters" pane and switch General ➔ Simulation ➔ Freeze Simulation from "Off" to "On". See picture "2" below.
Second drop target: the left shoulder
Keep in mind: From now on you cannot use the regular buttons "Simulate" and "Clear", otherwise the "belly shape" will be destroyed (even if it is freezed).
To place a Shape object on the left shoulder, you must rotate the model back to the normal pose. If the "belly shape" did not follow the rotation, you forgot to parent it.
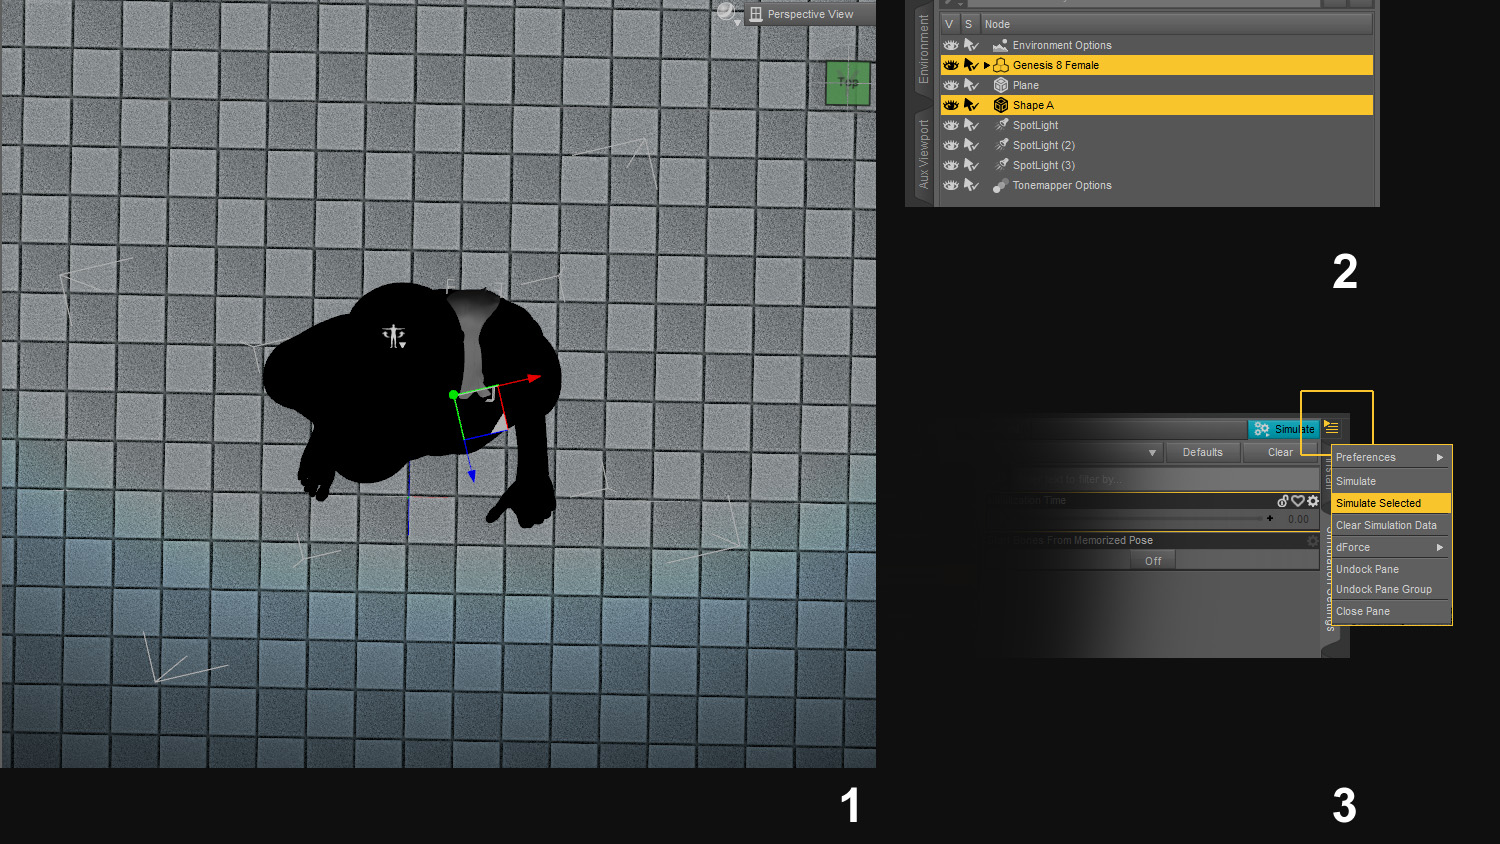
After you have rotated the model load and position the shape object (Picture "1" below).
Very important steps! From now on you use another way to start or clear the simulation:
1) In the "Scene" pane, use the CTRL key to select both - the shape object and the model (or drop target). See picture "2" below.
2) Use the "Burger" icon (to the left of the "Simulate" button) to open a context menu and click on "Simulate Selected" (picture "3").
If you want to "clear" the simulation, open the "Burger" menu and select dForce ➔ Clear all non-Frozen objects.
When you are satisfied with the simulation result on the left shoulder, you have to parent and to "freeze" the shape object as explained above.
Third drop target: the right arm
The procedure for the third (and all subsequent) steps follows the instructions of the second step:1) Rotate the model and position the shape object
2) Use the CTRL key to select both - the shape object and the drop target in the "Scene" pane
3) Use the "Simulate Selected" option from the "Burger" menu
4) Parent and "freeze" the simulated object like explained.